|
|
Astridr's Baby and Toddler Eura Dress Patterns
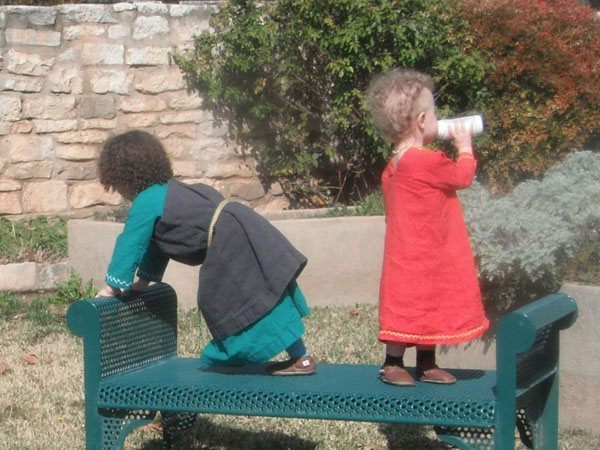
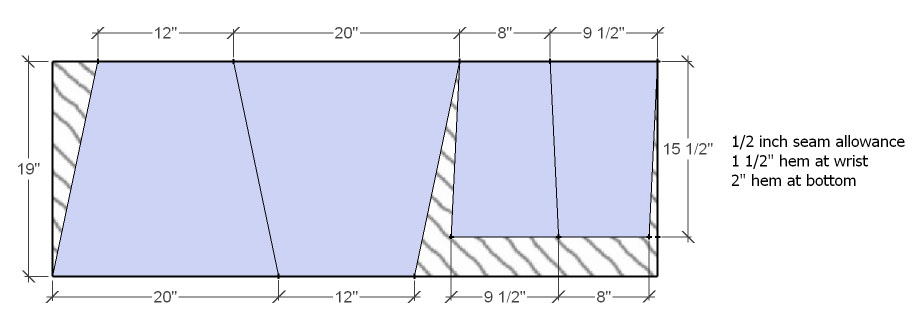
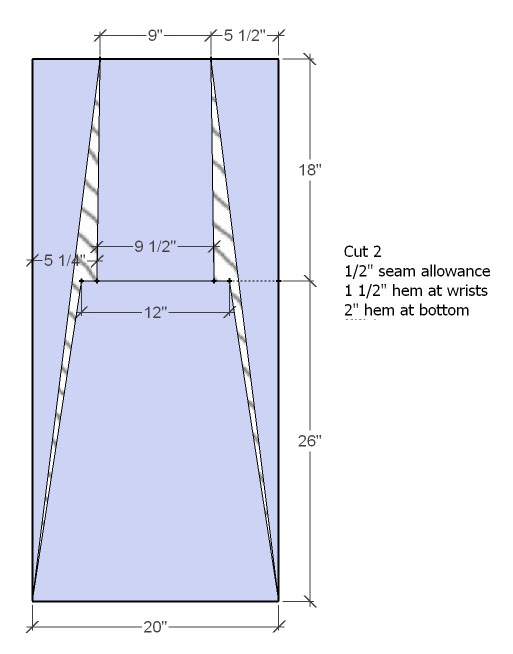
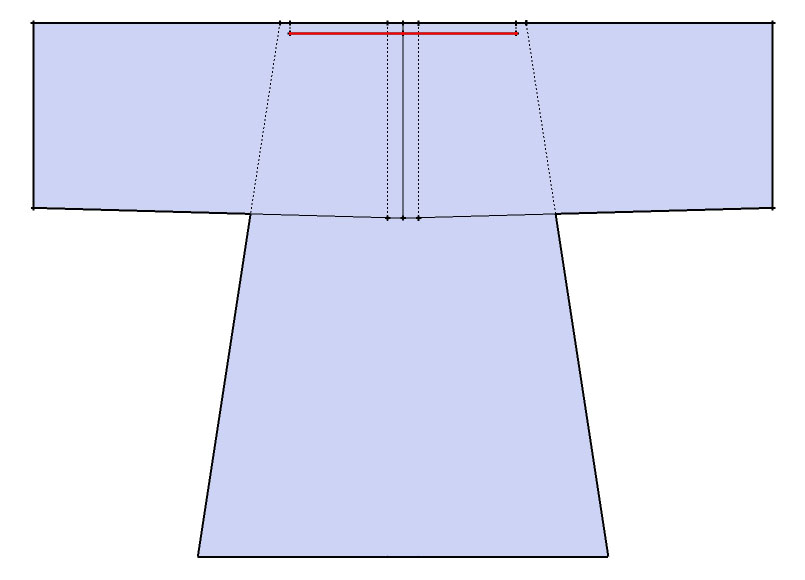
Eura dresses are a great option for babies and toddlers. The neck hole is large enough to accommodate their disproportionately large heads without requiring some sort of closure that may become a choking hazard. They are all straight lines and very fabric efficient. And my kids really love wearing them because they're comfortable and they aren't too fussy to play in, but with a bit of embroidery and nice fabric selection they can look very spiffy. Fit sizes are approximately relative to "real world" sizing, which is stated by age, but which might not be the actual size of the child in question at that age. If you are making this as a gift, ask the parent. Baby dress fits a child size 0-18 months. It will be really large on a newborn, but since they don't walk, I wouldn't worry about them tripping, better to worry about how quickly they will grow out of it and make it large enough to last. Toddler size fits approzimately 24 months-3T. It will be very long on a younger toddler, hike it up with a belt. It will be ankle length on an older toddler, that's fine. Again, they don't wear it often and grow quickly, so we're aiming for longevity. You will notice they are really generous around the torso. That is for comfort, ease of getting the child into the garment, and I'm hoping it can be re-purposed as a tunic for the next size up (like the baby dress will become a toddler tunic). I haven't tested that theory out yet. The baby eura dress doesn't have the gores, they don't really need it, so I thought it best not to waste the effort. The toddler dress is constructed the same as an adult eura dress. Grey bits are pattern pieces. White bits with diagonal black lines are waste. Use them to stuff a doll or something. The PatternsBaby Eura Dress Toddler Eura Dress Assembly1: Hem the sleeves 1 1/2" at the widest end. This edge will become the neckline. 2: Find and mark the center of the shortest side of the body pieces. 3: Attach sleeves to the front body piece by aligning the hemmed edge at the point where you have marked the center on the body and attaching the length of the arm to the top edge of the body piece, right sides together. Sew from 1/2" from the edge of the body piece across both arms (backstitch a few times where they meet in the middle) to 1/2" short of the opposite body piece edge. Diagram shows body piece with arm pieces laid on top. Dotted lines show hemming on the arm pieces, and the edges of the body piece if you had x-ray vision. Red line shows where you should sew. 4: Repeat step 3 to attach the sleeves to the back body piece. 5: (Toddler and adult Eura dress only) Sew gore pieces together on straight of grain to make 2 gores. 6: (Toddler and adult Eura dress only) Attach gore to front body piece and front underarm seam, starting from the bottom hem. Stop when you run out of gore (which may happen before you reach the end of the sleeve or after) and do not sew over the center seam of the gore. 7: Sew up side seam, aligning pieces from hem to wrist. On adult garments I sometimes align and pin my pieces from the armpit to the wrist and from the armpit to the bottom hem just to keep it all square. I don't find it gets out of square as much on children's sized garments. 8: Hem wrists (1 1/2" hem allowance) and bottom hem (2" hem allowance), remembering to shape the bottom hem before hemming (otherwise it will be longer at the sides than in the front and back). Shaping can be done by measuring from the top seam to the hem and then from the underarm seam where the body meets the arms to the hem and drawing a curve between those points, and extending it out over the gore. I like hemming with a herringbone stitch, especially at the wrists, as they are tiny and very fiddly to feed through a machine. Might as well embellish them while hand-hemming. Email Me! |